Create a Virtual Environment with VMware Workstation Pro
28.1.2025Petr Večeřa
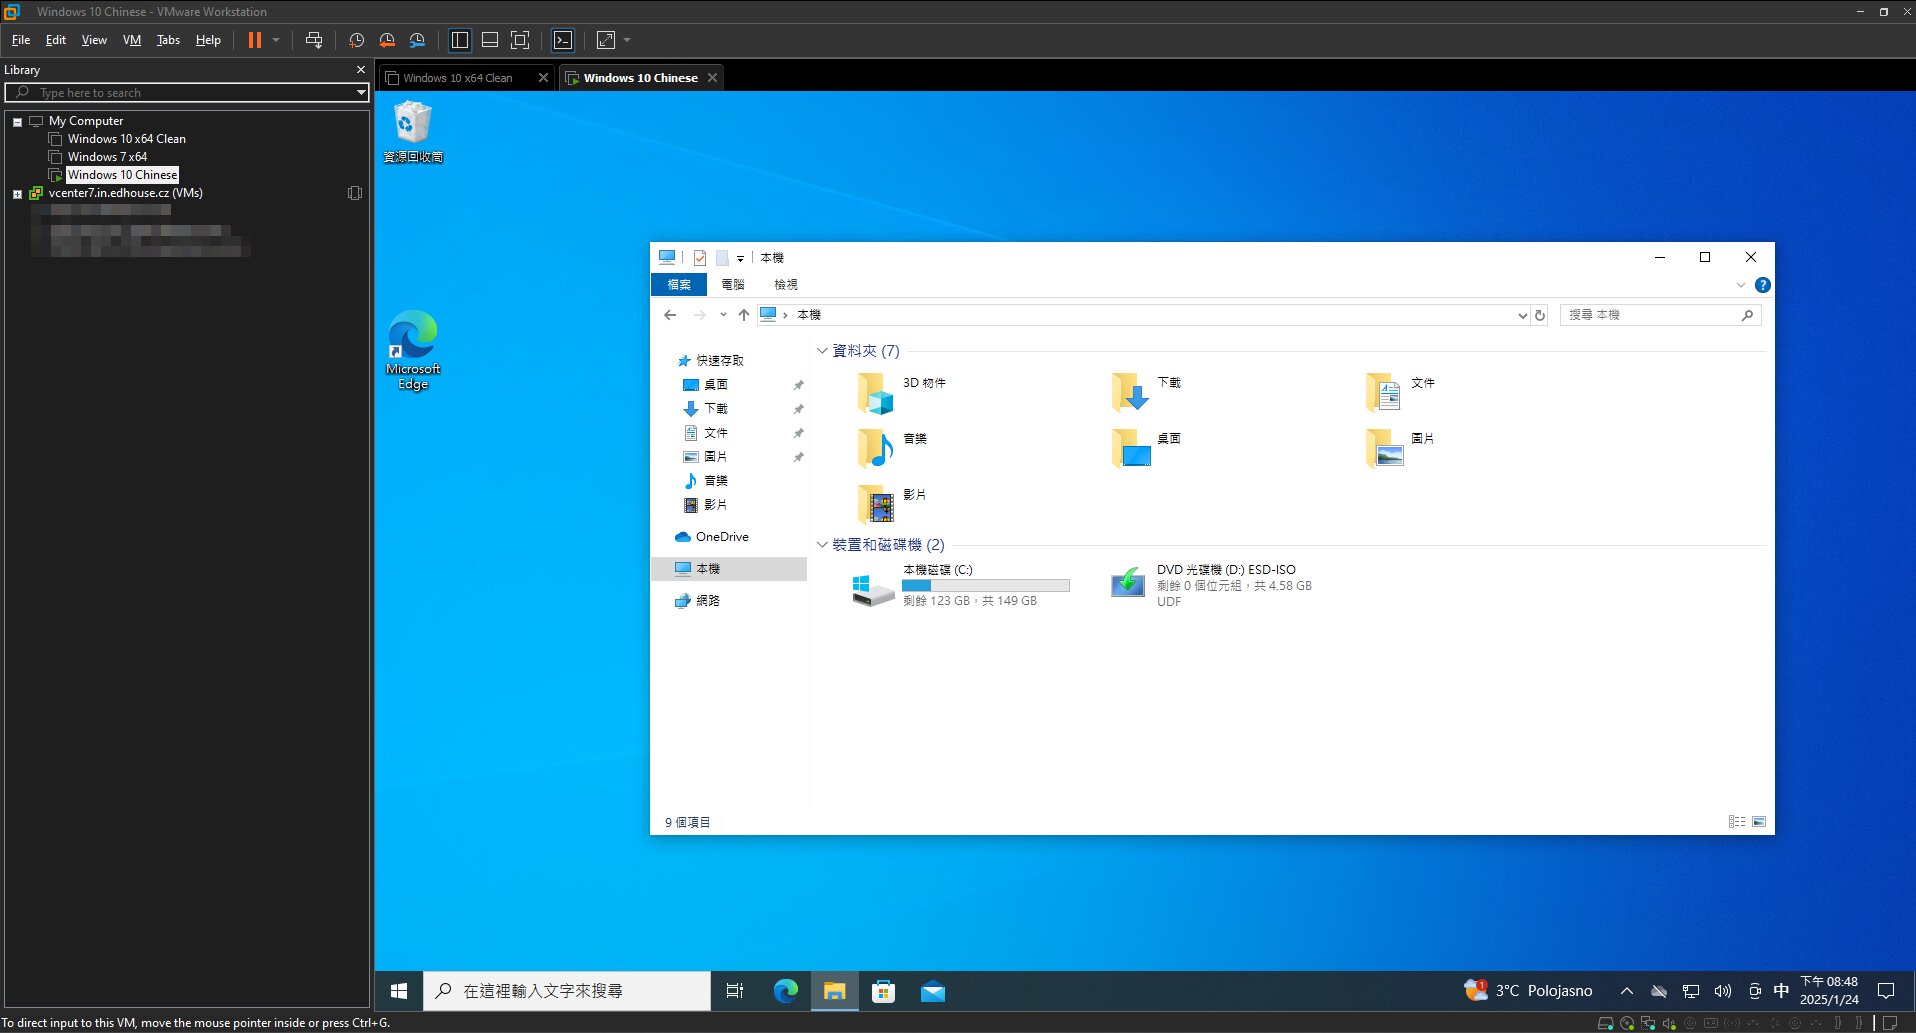
Creation, maintenance and orchestration of virtual environments is part of software tester’s daily routine on most projects, especially when working with desktop applications. Virtual Machines (VMs) help you create isolated environments with different test configurations on a single machine eliminating the need for multiple pieces of hardware.
At the end of 2024, the VMware company has announced a change in the license terms of the VMware Workstation Pro software application (includes VMware Fusion Pro for macOS), which is now being offered for free also for commercial purposes. I consider that a great opportunity for testers or those applying for a testing position to explore VMs and add a very useful skill to their resumes.
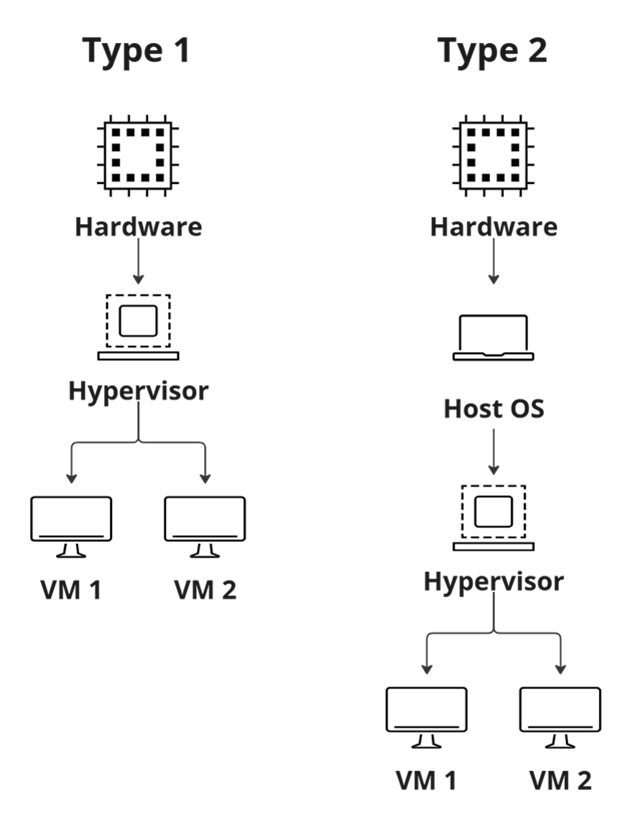
Type 2 Hypervisor
As part of the introduction, it is useful to state that VMware Workstation is a Type 2 hypervisor. A hypervisor is a piece of software that creates and runs VMs. A type 1 hypervisor runs directly on top of hardware and serves as a lightweight operating system, while a type 2 hypervisor runs in a host OS as a software application. In the diagram below, Host OS could represent Windows installed on your machine.
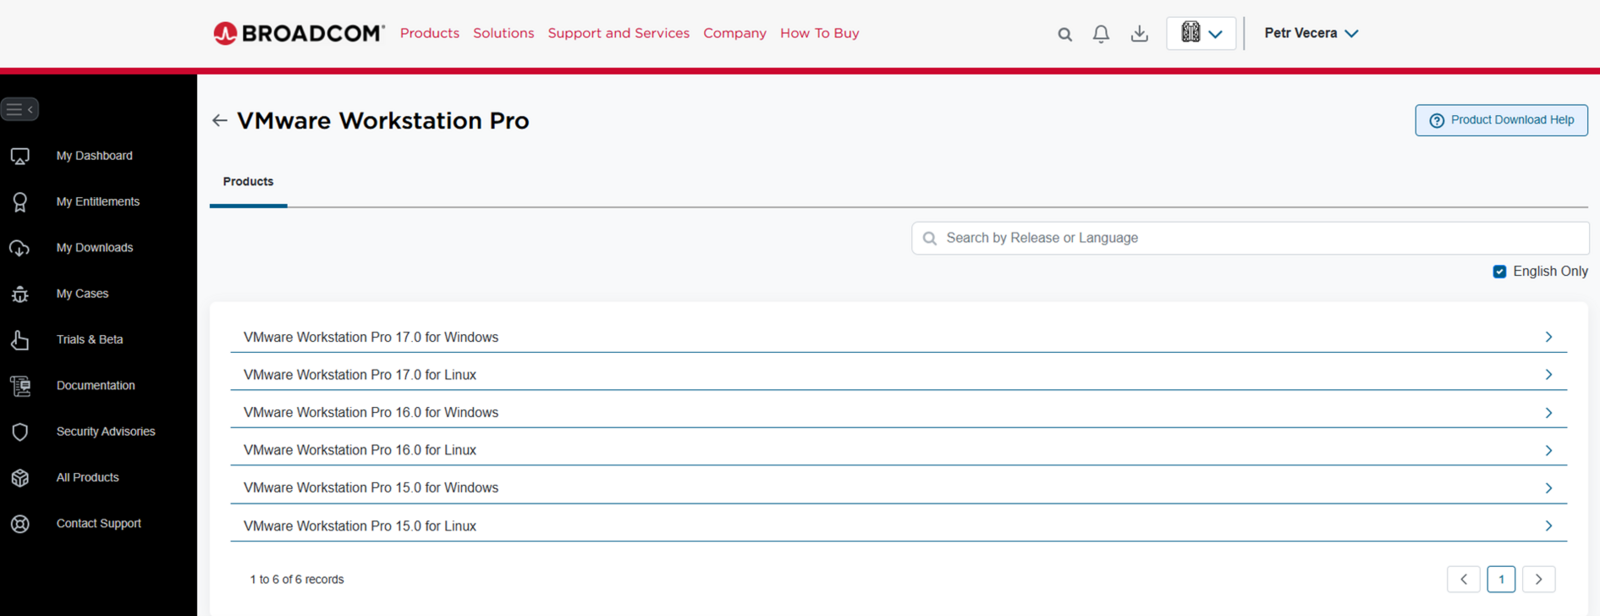
For the download of the application, you will be redirected to the website of Broadcom (acquired VMware in 2023), where you can create a free account. After sign-up, the installation files will become available to you. Download the software and install it on your machine.
Creating Your First VM
Let’s create a new VM with Windows. First, we need to obtain a Windows installation medium using the MediaCreationTool by Microsoft.
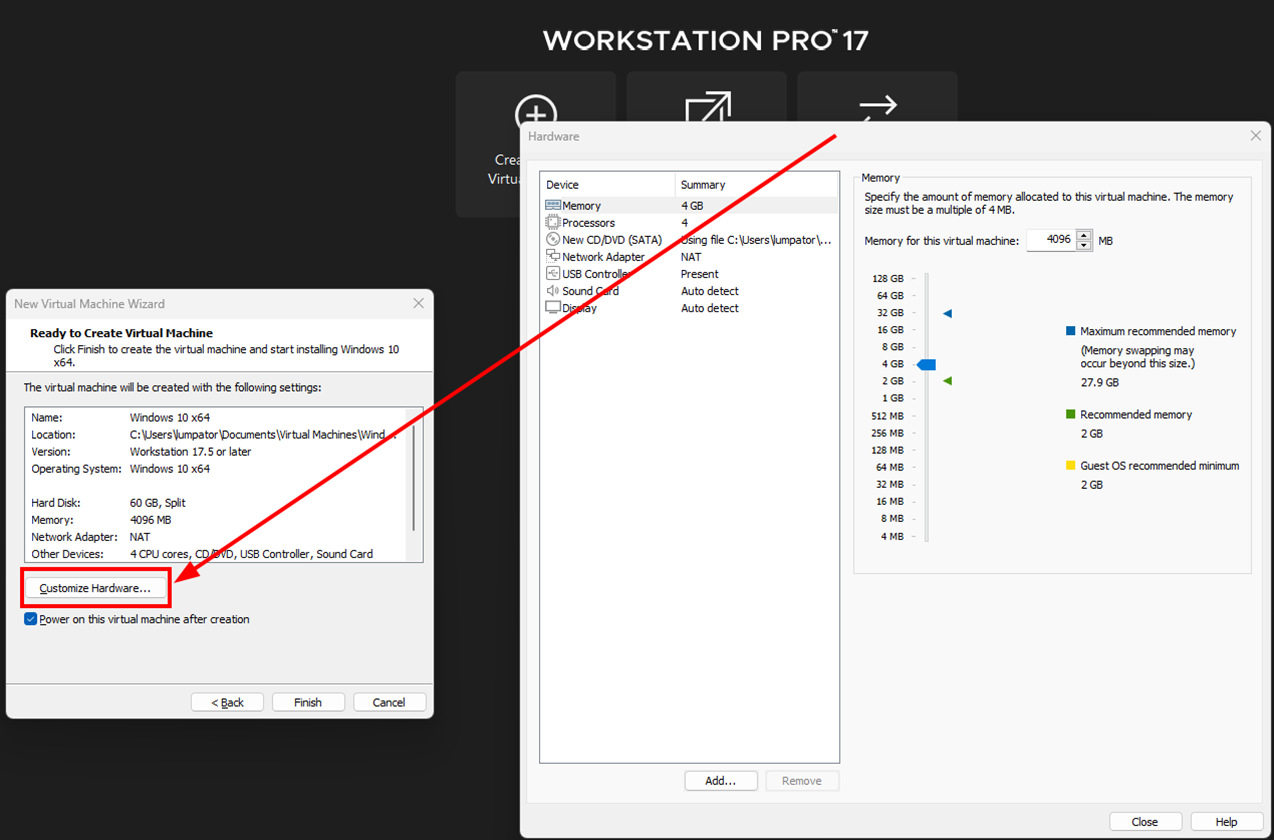
Launch VMware Workstation and select Create New Virtual Machine on the home screen. In the first dialog, choose Typical (recommended), and select the created Windows ISO installation file. Continue by specifying the HW parameters of your VM. It is important to know that as you are running the VMs on your machine, they will draw from the same pool of HW resources as your host OS. For example, if your laptop RAM capacity is 8GB, a VM with 8GB of RAM will not perform well (it will be very unstable).
Once you click Finish your new VM will start, and you will need to go through the standard steps of Windows OS installation.
TIP
For the purposes of software testing, you likely do not want to associate any account with your VMs. However, the latest ISO for Windows installation will not let you install without Microsoft account details. Click here to learn how to work around this limitation.
VMware Tools
I recommend installing VMware tools on every new VM. The package contains quality of life and performance improvements when working with your VM. One of the big improvements is that the resolution of your VM will automatically adjust to the size of its window. VMware workstation enables the installation of VMware tools by inserting an installation medium into a virtual drive of your machine. Afterwards, it only takes a few steps to install.
Effective Testing Thanks to Snapshots
Snapshots undoubtedly count among the most powerful tools in the VM toolbox. A snapshot stores a particular state of a VM that the user can choose to restore at any time. This is very handy in a number of scenarios, for example
when we need to run a test that can have destructive effects on the host OS,
running a repeated test having side effects on the host environment (we can easily return to the original state to run the test in the same conditions and ensure conclusive results),
going back to a ‘fresh’ state of the VM before we installed the software under examination.
Even though a snapshot can be created while the VM is running, I recommend turning off the VM before capturing a snapshot. Offline snapshots are much more stable, and their capture and restoration is much faster. You can of course have multiple snapshots and even organize them in a tree. Just know that each snapshot takes up space on the hard drive of your host.
TIP
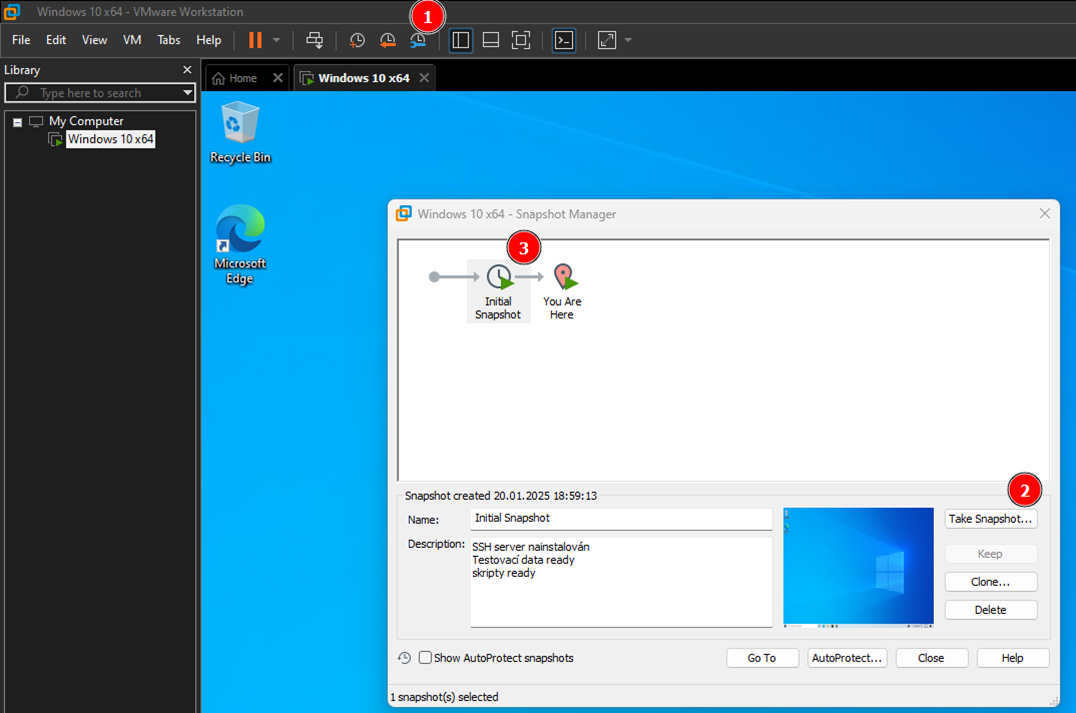
Create a so-called Initial Snapshot immediately after creating a VM. The snapshot will contain the state before the deployment of the software under test. It will serve as a convenient checkpoint you can restore to ensure that a new deployment of the software is tested in a fresh environment. I personally include also these in the initial snapshot:
Preparation of testing data,
custom testing scripts,
SSH server setup,
Preparation of any additional installation media or files on disk needed for testing,
Any host configuration needed, e.g. IP settings on network adapters.
Trust me, thanks to snapshots, you will save yourself hours of labor and a whole lot of cursing 😊
Thats all folks, now your VM is ready for hosting your experiments. For that you might find the official documentation handy.
Good (bug) hunting, testers!
Share article
Author
Petr VečeřaFormer marketer turned SQE with a focus on automation – and a lifelong Pokémon fan.
Get the latest updates from the world of Edhouse – news, events, and current software and hardware trends.
Thank you for your interest in subscribing to our newsletter! To complete your registration you need to confirm your subscription. We have just sent you a confirmation link to the email address you provided. Please click on this link to complete your registration. If you do not find the email, please check your spam or "Promotions" folder.